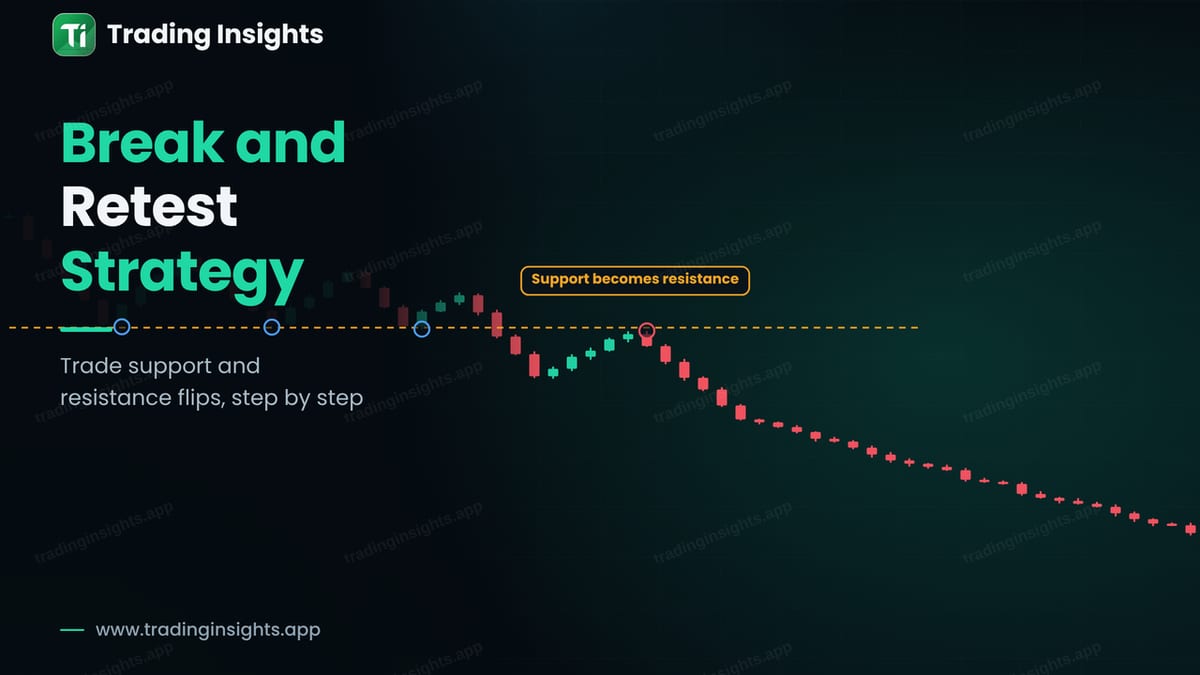
The break and retest strategy is built on a simple observation: when price breaks through a support or resistance level, that level often changes role. A broken support can become resistance, and a broken resistance can become support. Instead of chasing the break, you wait for price to come back and test the level from the other side, and you trade the reaction. This gives a better entry price and a closer stop than entering on the break itself. This guide explains the rules, shows how to tell a retest that holds from one that fails, and walks through a sell trade with a stop, a target and a lot size. As with any strategy, it has losing trades, and it needs testing.
Why levels flip
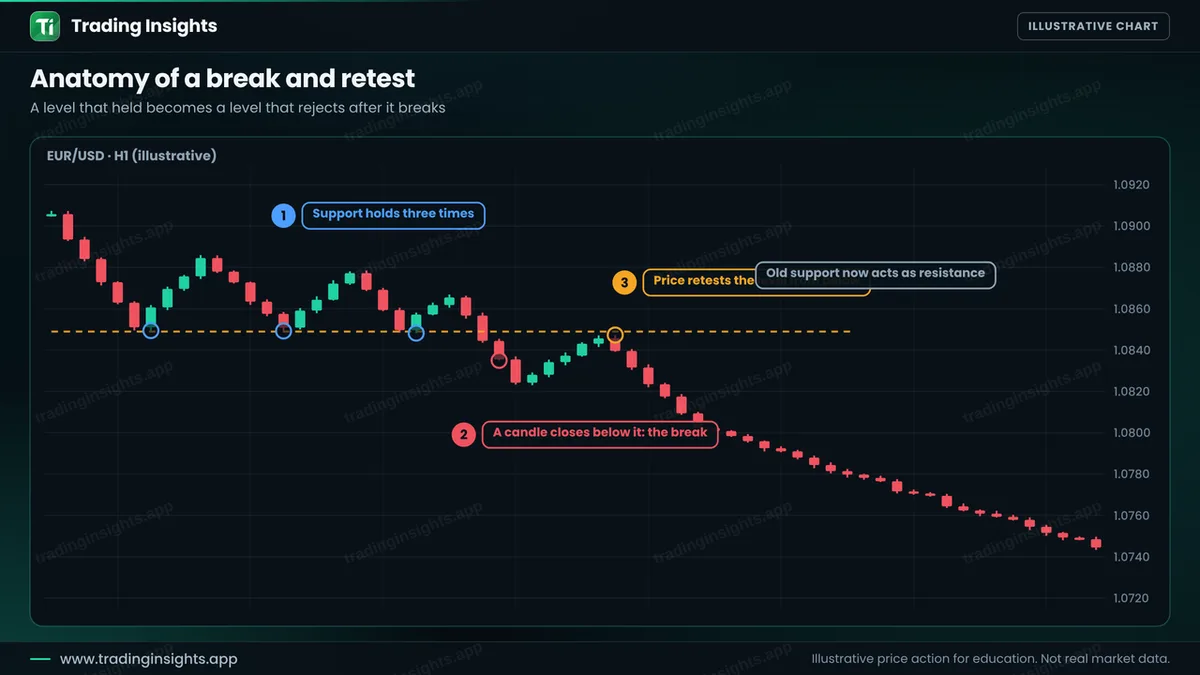
A support level is an area where buyers have stepped in several times. When price finally closes below it, those buyers are trapped on the wrong side, and traders who wanted to sell see the level as a place to join the move. When price rallies back to the old support, some trapped buyers sell to get out at break-even, and new sellers enter. This is the usual explanation for the role reversal. It is an explanation, not a law, and you must always check what price actually does at the level. To review how these levels are drawn, see support and resistance vs supply and demand zones.
The rules, step by step
- Find a level that mattered. A level tested at least two or three times is better than a level touched once. Zones are more realistic than exact lines.
- Wait for a real break. A candle must close beyond the level. A wick through it is not a break. See the same rule in break of structure.
- Do not chase. Let price move away and then come back. Many breaks never return, and you accept missing them.
- Watch the retest. Price returns to the broken level from the other side. You are looking for rejection, such as a bearish candle or a wick that fails to close above the level.
- Enter after the rejection. Not at the first touch, but after the candle shows that the level holds.
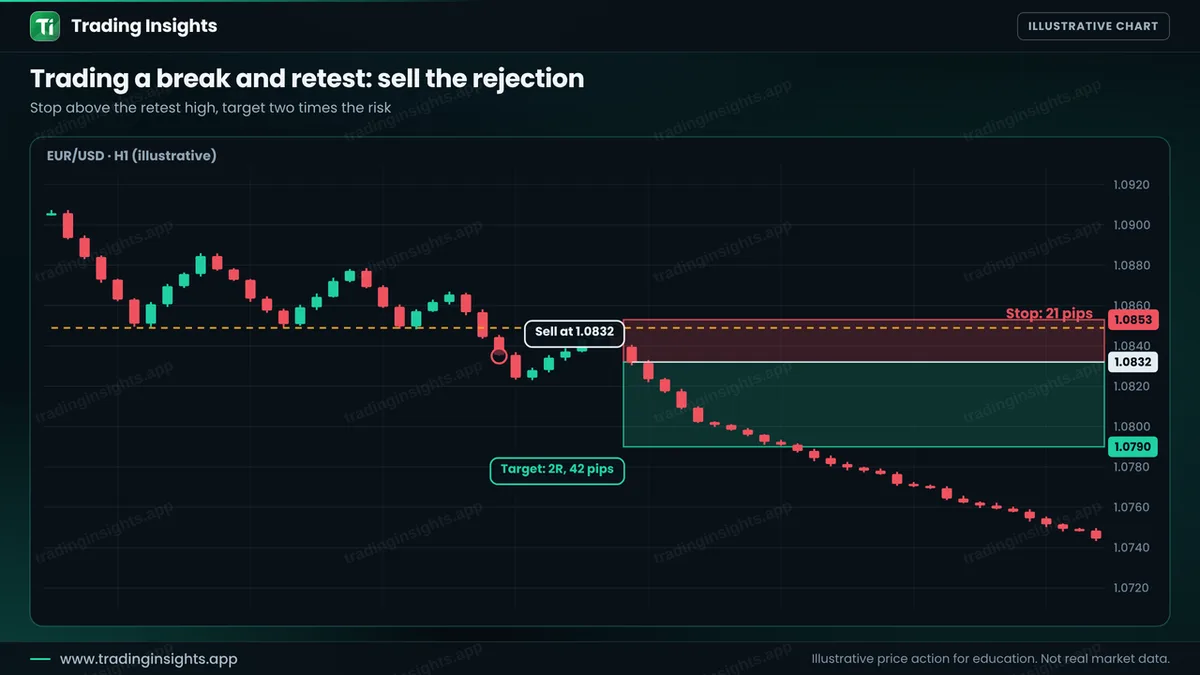
- Place the stop beyond the retest. Above the retest high for a sell, with a small buffer, because the stop is the level where the idea is wrong.
- Set the target. A multiple of the risk, such as 2R, or the next support or resistance. See stop loss and take profit.
A retest that holds and a retest that fails
The key moment is what happens when price comes back to the level. If it is rejected, the break is confirmed. If price closes back through the level in the other direction, the break has failed and the level is no longer a good trade location.
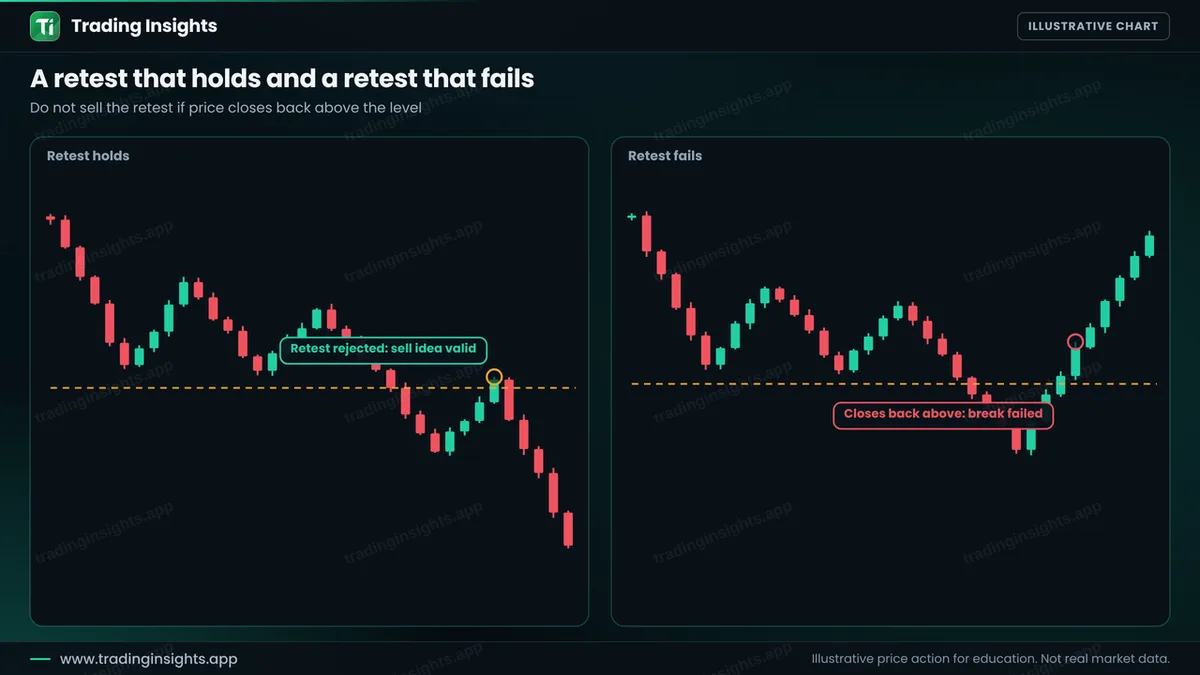
A failed break can also be a trap, since price takes out the level, brings in breakout traders and then reverses. This is a liquidity sweep, and it is one more reason to wait for the close and for the rejection. If the break fails, do not argue with the market: the stop closes the trade and you look for the next setup.